

Many of you told us how much you enjoyed Jess' (from OklaRoots) tips for sewing on vinyl last week. This week she shares a fast, fun, and free project which has many uses. Jess’ zipper bag with waterproof lining is perfect for holiday treats or as a wet suit bag for the pool!
Jess from OklaRoots does it again with an adorable bag with a waterproof lining featuring one of Bonnie’s Santa Buddies. It would also be fun to make an Easter treat bag using Bunny Buddies or Eggsquisite Jewels, or a bag for wet swim suits using Merry Mermaids or Sea Buddies.

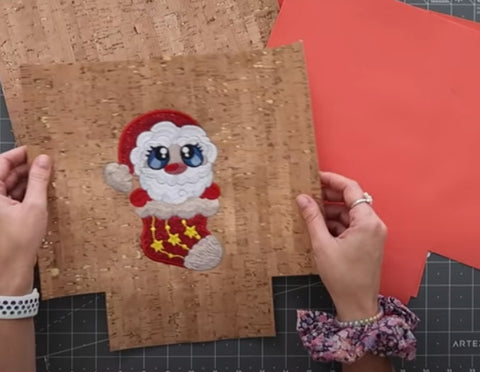
The bag is Jess’ own design, a basic square with boxed corners. The back and outer panel are cork, there is a simple zipper up top, and the inside is waterproof canvas.
Waterproof canvas is great because you don't have to interface it, it's very firm and it's very easy to work with. You can easily wipe it down and wash it off.
The bag holds two-dozen cookies, snacks, or wet swimming gear.
Here is what you will need:
- Half-yard of vinyl or cork and a half-yard of waterproof canvas.
- 10.5” zipper tape or a 10” or 12” standard zipper
- Zipper tabs: cotton scrap 2” square
In the end, panels will be 12 inches by 12 inches. For wiggle room, embroider on a piece of cork that is larger.
Jess hooped two layers of cutaway stabilizer and floated the cork in the hoop. When embroidery is finished, trim away stabilizer and jump threads.

Trim the cork to a 12” square with the embroidery centered vertically in the hoop. Your embroidery is actually going to lie a little bit lower on the bag than true horizontal center because you will lose whatever is used for the boxed corner. You will also lose a little bit with the seam allowance too, so it's always good to go bigger than you think you need.

Mark corner boxes and cut them out. Jess used a two-and-one-half-inch box corner so the bottom two-and-one-half inches of the exterior fabric are going to be folded under and won't be seen.
The bigger that you box your corners, the shorter your bag will be and the more of a V-shape you're going to have. If you want a taller and straighter bag, just make your box corners a little bit smaller.
Repeat the corner boxing process for the bottom of your other exterior panel and both of your lining panels.
If you're using waterproof canvas, the back side is that rubbery side. The right side is the woven side.
Ready for Part 2? You will want to go here. Check back next week and I’ll show you how Jess put it all together! You can see her full video here.

Bonnie Welsh - January 21, 2021
Jeannette—That would be a good question to ask Jess, from OklaRoots, who did the original video over on her YouTube channel. Jess just allowed us to share the details of her bag over on our blog as a free project since she used one of my designs. Her YouTube channel where she created the bag and you can request how to add a strap is: https://www.youtube.com/watch?v=cF-u6OJW_-U&t=17s
Jeannette Williams - January 21, 2021
how would you place a crossover strap to the cookie bag?? please put it on one of the cookie bag video. thank you
Bonnie Welsh - January 19, 2021
Charlotte-What a great idea and who doesn’t love chocolate chip cookies! =)
charlotte - January 18, 2021
I made these for Christmas for my grandkids teachers. Added my choc chip cookies – they were such a hit!!! I had trouble finding the bad bling though so just did some hot glues pretties. what fun